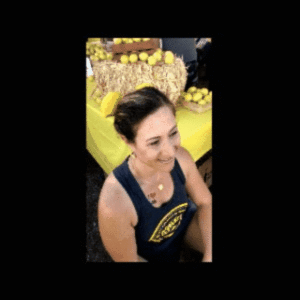
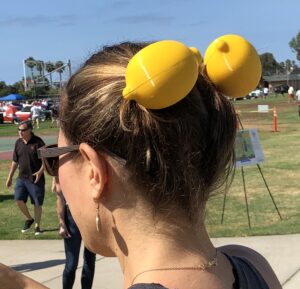
It’s that time of year again, time for the Goleta California Lemon Festival! That means time for my family to not only go, but to do a lot of volunteering and helping out. This year I decided to make my wife some lemons to go over her “space buns” hairstyle she sometimes sports.
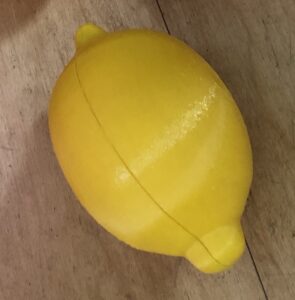
As always I started by opening up Fusion 360 and modeling out what I wanted. I drew a line that looked like the profile of half a lemon. I selected the line and used the Offset tool to make a copy of the line that was a few millimeters smaller. I selected the first line and did a rotation of it around the center-line (the line that connected the top point of the outer part of the line to the bottom point) for 360 degrees. This gave me a very possible lemon shape. I then selected the inner curve, again did a rotation around the same center-line and this time let it cut that shape out of the first shape, leaving me with a hollow lemon. That was the plan, I actually had to go back and modify this line to leave more of the interior intact at the top and bottom for later (Fusion 360 makes it so easy to go back and modify parts once you realize you needed to do something earlier that you forgot to do).
I needed the lemon in two pieces so she could put it over the bun easily, so I selected the body and used one of the origin planes that neatly bisected it to split the body into 2 new bodies that were exact mirrors of each other.
Since this was going to cover her hair buns it would need a hole for the hair to go through. I made a cylinder perpendicular to the plan I used for splitting the lemon in half and extruded through on side of the lemon in a cut, so it removed a perfect half circle from each half of the lemon.
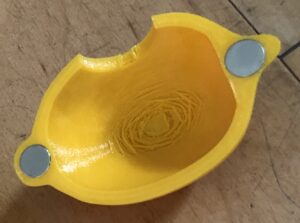
Now to be able to have the halves attach to each other. Enter one of my favorite tools for this function: magnets! I hid one half of the lemon, drew two circles on the ends of that half that were the diameter of the magnets i was planning on using (plus 0.25 mm), un-hid the first half and did a double sided, symmetrical cutting extrusion of the circles so it cut matching holed in both halves at once. (You can see why I had to go back and modify that internal cut to leave space for the magnets!) The magnets are disk shaped and 1/2″ x 1/16″.
Printing was great. Well, almost great. I had a hard time getting the first half off the print bed and forgot to re-calibrate the bed for the next print. That print ended up being too close to the bed and the print would NOT come off the BuildTak sheet and ended up ruining the sheet. Thankfully they are easily replaceable. The good news is I found this amazing replacement that fits my printer more than well enough and makes the whole process of printing and popping the prints off the bed 1000x easier. The downside is I HAVE to re-calibrate between each and every print, but it is a small price to pay for how well the prints release from the bed now.
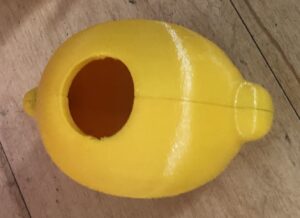
I printed in yellow PETG. PLA would have been fine, but i had yellow PETG hanging around, so I used that. I printed these at 0.3 mm and a 40% infill, which is ridiculous, a 55 or 10% would have been more than enough, but I wasn’t paying attention to the infill and I had been working at a high infill percentage for a structural part I was doing at the same time. That made the final prints a little heavier than I wanted, but all in all I was super happy with how they came out.
Final result was a pair of lemons that looked like lemons, fit over my wife’s “space buns” hair style perfectly and got a ton of compliments all day! Mission accomplished!
you can download the .stl files from Thingiverse.