Due to a lack of planning we had 2 days to make 11 t-shirts for the kids on the Math Superbowl team, but we pulled it off. Here is the process, pics and settings we used to get these done quickly.
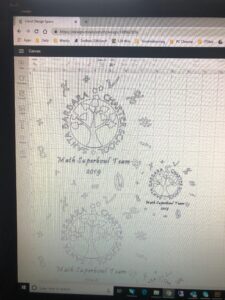
We started with the school logo, scraped from the Facebook page, we imported the jpeg file into Cricut Design Studio as a “complex image” to keep as much of the detail as we could. The ring of math symbols we made in Adobe Illustrator by making a circle, and then using the “Type on path” function to add the symbols. We changed the font and size and then added the same number of spaces between each character until they spread all the way around the circle evenly. Exported the circle as an SVG and imported into Cricut Design Studio.
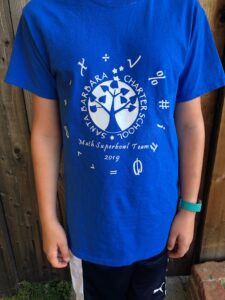
We sized up the circle, logo and added text and then sized the whole thing. The original idea was to do a large (10″ or 12″ diameter) image on the back and a small (4″ diameter) one on the front in a “pocket placement”. The small one was too complex to bee weeded easily and we opted to drop that and go with just a singe 10″ diameter placement on the front.
We were able to fit them 2-up on 20″ vinyl sections, 3 sections from a single Siser Mega Roll yielding 6 images per roll. Weturned on our Cricut Maker and used the Cricut 24″ blue light-grip mat and a Cricut Premium Fine Point blade. The images cut pretty well, but with the detailed lettering the weeding took some time. We found the key was to first pull out the small bits and then to pull back the bits that went into sharp angle cuts (the “v” sections of M and W characters, or the inside bits of E and G, etc.). Once the cleanup was done we pulled the larger section off and the letters stayed on the carrier sheet perfectly.

After a little experimenting on the first one we fond the optimal settings for pressing this project to these t-shirts (100% cotton) was to set our EasyPress 2 to 335 F and set the timer on it to 30 seconds. We would pre-heat the front of the shirt for 30 seconds, align the transfer, press for 30 seconds, flip the shirt over and press from the back for 30 seconds, flip back, give it about 10 seconds to go from “hot” to “warm”, carefully peel the carrier sheet (sometimes a letter would not fully stick to the shirt and would have to be pulled from the carrier sheet with tweezers and pressed down to the shirt. We would then cover the image with parchment paper, press for another 30 seconds, flip the shirt (keeping the parchment between the image and the EasyPress mat) and press for a final 30 seconds.
The things to remember with a project like this:
- Weeding takes longer than you think it will
- Be careful of too much fine detail in your design
- The first press is always tricky when trying to figure out your settings, but once you get it off the carrier sheet parchment is your friend for a final press